
How to code with chatgpt claude gemini copilot: A Practical VS Code Guide
Coding with AI assistants is more than just having a chatbot open in another tab. When you bring tools like ChatGPT, Claude, Gemini, and Copilot directly into your editor, you can stop context-switching and start building a real, integrated workflow. The goal is to get out of the browser and create a single, powerful coding cockpit.
Setting Up Your AI Coding Environment in VS Code
If you’ve ever found yourself juggling a dozen browser tabs just to get an AI’s help on a piece of code, you know how disruptive it can be. The most effective way to work is to bring everything into one place. By integrating ChatGPT, Claude, Gemini, and GitHub Copilot right into Visual Studio Code or a purpose-built editor like Cursor, you centralize your toolset and create a far more efficient workspace.
This isn’t just about saving a few clicks. It’s a strategic move that lets you pick the right tool for the job, on the fly, without ever leaving your editor.
Core Extensions and Configuration
Your first stop is the VS Code Marketplace to grab the necessary extensions. Thankfully, every major AI provider has an official or well-supported extension to bridge the gap between their models and your editor.
- GitHub Copilot: For most of us, this is the starting point. Install it, and you’ll get real-time, inline code suggestions as you type. It’s fantastic for knocking out boilerplate code, finishing functions, and working within the context of your current file.
- ChatGPT (OpenAI): An extension like “Genie AI” gives you a side-panel chat with ChatGPT models. You’ll just need to grab an API key from your OpenAI account and plug it in.
- Claude (Anthropic): Similar extensions exist for Claude, connecting you to the Anthropic API. This is your go-to when you need to reason over a large chunk of code, thanks to its massive context window.
- Gemini (Google): The official “Google Gemini” extension from the Google AI Studio brings Gemini’s power into your editor, giving you another top-tier option for generating code and thinking through problems.
Don’t think of these tools as competitors. Think of them as a specialized team. Copilot is your tireless pair programmer for the small stuff. ChatGPT is great for brainstorming design patterns. And Claude is the one you call in to refactor a complex, multi-file feature.
Once you have the extensions installed, setup is usually pretty simple. You’ll be prompted for an API key, which you can find on each provider’s developer dashboard. Just pop it into your VS Code settings, and you’re good to go.
A Quick Comparison
To help you decide which tool to reach for, here’s a quick breakdown of their strengths.
AI Assistant Quick-Start Comparison
| AI Assistant | Primary Strength | Best For… | Integration Method |
|---|---|---|---|
| GitHub Copilot | Inline code autocompletion | Boilerplate, function completion, and in-file context. | Official VS Code Extension |
| ChatGPT | Creative code generation | Brainstorming algorithms, new features, and scripts. | Third-party VS Code Extension |
| Claude | Large context window & reasoning | Refactoring entire codebases and analyzing complex logic. | Third-party VS Code Extension |
| Gemini | Multimodal understanding | Code generation, debugging, and complex problem-solving. | Official VS Code Extension |
This table gives you a starting point for building your mental model of which AI to use for which task.
A Unified Workflow in Action
With everything connected, your daily routine changes completely. Instead of copying and pasting code snippets into a web chat, you can just highlight a block of code, right-click, and send it to your chosen AI for a refactor, an explanation, or a bug fix. Don’t be afraid to experiment, either; you can always check out some of the best free ChatGPT alternatives to see if other models might fit your style.
This tight feedback loop is where the magic happens. For a much deeper look at which tools are best for specific programming tasks, check out our guide on the best AI coding tools. It’ll help you fine-tune your new setup even further. By bringing all your AI assistants under one roof, you’re not just saving time—you’re building a command center that speeds up everything you do.
Writing Prompts That Actually Generate Production-Ready Code
The real magic of using an AI coding assistant isn’t just about asking simple questions. It’s about mastering the art of the prompt. A well-crafted prompt is like handing over a detailed spec document—it’s the key difference between getting a half-baked suggestion and receiving clean, maintainable code that fits right into your project.
Throwing a one-liner like “write a function that does X” at ChatGPT, Claude, or Gemini is a recipe for frustration. These models are incredibly powerful, but they start with zero context about your project’s architecture, dependencies, or coding style. Your job is to fill in those blanks.
The Foundation: Context-Driven Prompts
Before you get fancy, there are a few non-negotiable pieces of information you should include in almost every coding prompt. Think of this as the minimum viable context for a good result.
- State the Goal Clearly: What’s the business logic you’re trying to build? Start with a simple, high-level description of what you want to achieve.
- Provide the Language and Framework: Be specific. Don’t just say “JavaScript,” say “in TypeScript using the Next.js 14 App Router.”
- Include Existing Code: This is the most critical piece of the puzzle. Give the AI the function, class, or component you’re working on. It needs something to anchor its response.
- Specify Dependencies: Mention any key libraries or APIs the code needs to use. For example, “…using Axios for the API call and Zod for validation.”
Front-loading your prompt with this info immediately narrows the AI’s focus and stops it from making silly assumptions about your environment.
Leveling Up with Prompting Patterns
Once you’ve got the basics down, you can start using more structured techniques. These patterns are designed to guide the AI’s reasoning, leading to much better code.
Zero-Shot, One-Shot, and Few-Shot Prompting
These terms might sound a bit academic, but they’re simple, practical concepts that describe how many examples you give the AI.
-
Zero-Shot Prompting: You provide zero examples and just ask the AI to do something. This works best for simple, self-contained tasks.
- Example:
"Write a Python function to validate an email address using regex."
- Example:
-
One-Shot Prompting: You provide a single, clear example of the input and the desired output. This is fantastic for teaching the AI a specific format or style you want it to follow.
- Example:
"I need to convert a user object to a summary string. Example: Given {'name': 'Jane Doe', 'role': 'Admin'}, return 'Jane Doe (Admin)'. Now, convert this object: {'name': 'John Smith', 'role': 'Editor'}."
- Example:
-
Few-Shot Prompting: You provide several examples. This is your go-to for more complex transformations or when you need the AI to pick up on a subtle pattern. You can see how this structured approach drastically improves the output when you learn more about how AI for code generation models work.
Pro Tip: Trying to get the AI to match your team’s coding style? Few-shot prompting is your best friend. Give it 2-3 examples of your preferred style (think function declarations, variable naming, comments) before asking it to write anything new.
Advanced Strategies for Complex Problems
When you’re asking for more than just a single function—like designing a whole component or scripting an infrastructure change—you need to bring out the heavy hitters.
Assigning a Persona This is a simple but incredibly effective trick. Start your prompt by telling the AI who it should be. “Persona prompting” primes the model to adopt a specific mindset and pull from a more relevant knowledge base.
"Act as a senior DevOps engineer specializing in AWS.""You are an expert in database optimization for PostgreSQL.""Assume the role of a frontend developer focused on accessibility and React."
This one little instruction can dramatically improve the quality of the response.
Chain-of-Thought (CoT) Prompting For any multi-step problem, don’t ask for the final code all at once. Instead, add this magic phrase: “think step-by-step.” This forces the model to break the problem down, outline its logic, and then write the code. It cuts down on errors and makes the AI’s reasoning transparent, so if the final code is slightly off, you can easily see where it went wrong.
By combining these strategies—rich context, shot-based examples, personas, and step-by-step thinking—you can consistently get code from your AI assistant that you can actually use with confidence.
Building a Feature From Scratch with Your AI Team
Theory is great, but let’s be honest—nothing makes a concept click like seeing it in action. So, we’re going to walk through building a new API endpoint from the ground up, treating our AI assistants as a specialized dev team.
Our goal? A new /users/{userId}/profile endpoint that serves up a user’s basic profile info. We’ll start with high-level design, then crank out boilerplate code, wrestle with the tricky logic, write our tests, and finally, get the documentation squared away. The best part? We’ll do nearly all of it right inside VS Code.
Phase 1: Sketching the Architectural Blueprint with ChatGPT
Before a single line of code gets written, we need a plan. This is the perfect job for a broad, creative model like ChatGPT. I usually kick things off inside the VS Code chat panel with a prompt that gives the AI a clear role to play.
“Act as a senior backend engineer. I need to design a new GET API endpoint in a Node.js Express application using TypeScript. The endpoint is
/users/{userId}/profile. It should fetch user data from a PostgreSQL database, validate theuserIdparameter, handle cases where the user is not found, and return a JSON object withid,name,joinDate. Outline the required files, data schema, and the main controller logic.”
ChatGPT will come back with a solid starting point. It’ll suggest a file structure (think routes, controllers, and services folders), give you a basic Prisma or TypeORM schema for the User model, and sketch out the Express controller function. Just like that, you’ve got a clear roadmap and you’ve beaten the dreaded “blank page” problem.
As you work with these models, you’ll get a feel for how much detail to provide. Sometimes a simple request is enough, while other times you’ll want to give it specific examples to guide the output.
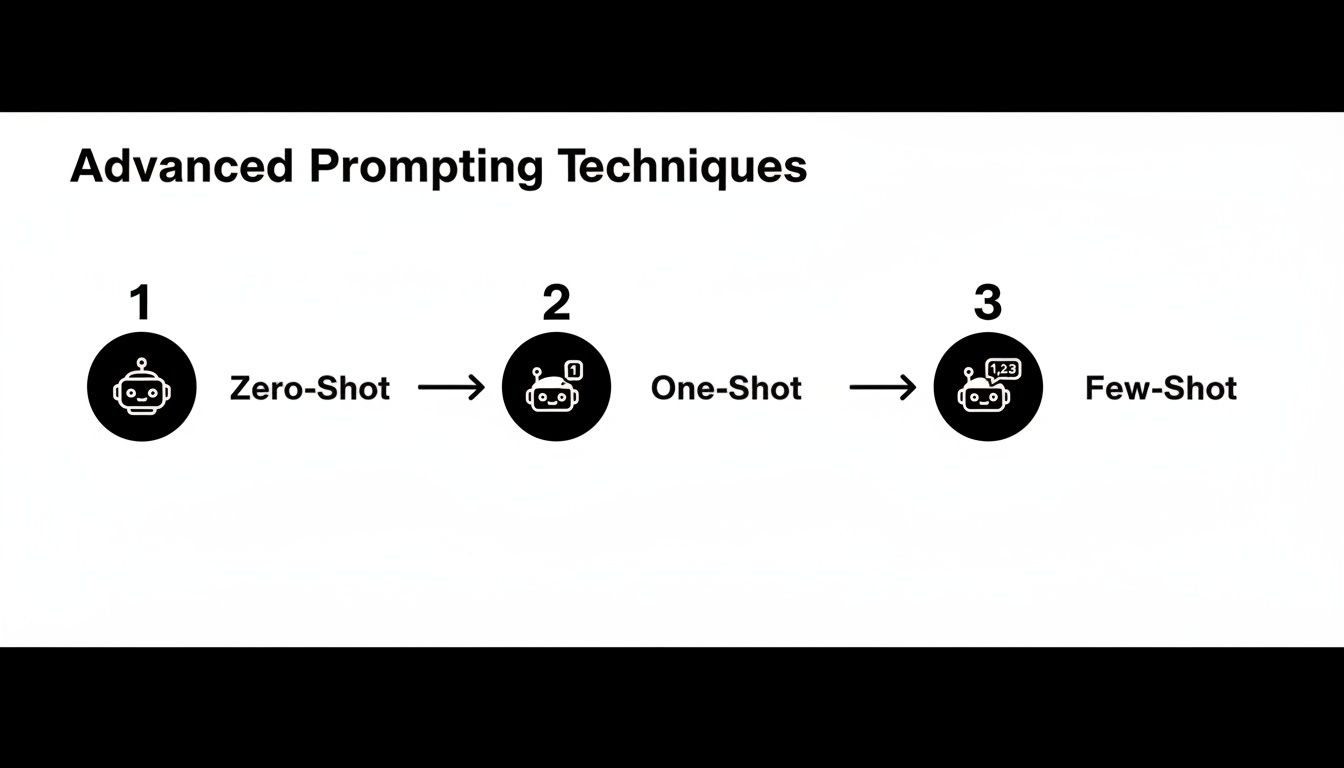
The key takeaway here is that the more context and examples you provide (moving from zero-shot to few-shot), the more the AI’s suggestions will line up with exactly what you need.
Phase 2: Generating Boilerplate and Inline Logic with GitHub Copilot
With our architecture mapped out, it’s time to create the files and start coding. This is where GitHub Copilot truly feels like magic.
As you create user.routes.ts, user.controller.ts, and user.service.ts, Copilot gets to work immediately. It analyzes your existing project and the new file names to suggest the necessary imports and boilerplate code, often before you even type anything.
Once you’re inside user.controller.ts, just type out the function signature that ChatGPT suggested: export const getUserProfile = async (req, res) => {. Almost instantly, Copilot will likely autocomplete the entire function body—parsing the userId, calling the service layer, and wrapping everything in the right success and error responses.
You’ll just accept the suggestions, maybe make a few small tweaks to match your personal style, and move on. This is Copilot’s sweet spot: crushing the predictable, repetitive code that connects all the pieces.
Phase 3: Untangling Complex Logic with Claude
Now for the fun part. Let’s say our user.service.ts needs to do more than a simple database lookup. It needs to join the users table with a profiles table, check a privacy setting, and format the joinDate based on the request’s Accept-Language header.
This kind of multi-step logic that spans different files and concepts is a perfect hand-off to Claude. Its large context window is a game-changer here.
I’ll just highlight the entire user.service.ts file, right-click, and send it over to the Claude chat panel with a detailed prompt:
“Here is my current user service. Please modify the
getUserProfilefunction. It needs to perform a database query that joins theUsermodel with theProfilemodel onuserId. It must also check aisPublicboolean on theProfilemodel and throw a 403 Forbidden error if it’s false. Finally, format thejoinDateusing theIntl.DateTimeFormatAPI, getting the locale from the request’sAccept-Languageheader.”
Because Claude can digest the entire file’s context, it understands exactly what I’m asking for. It will return a complete, refactored function that weaves in all that new business logic correctly.
Phase 4: Nailing Down Tests and Docs with Gemini
The feature is built, but we’re not done. We need tests. This is a task that Gemini handles beautifully.
Simply copy the final controller and service code into the Gemini panel and give it a clear directive:
“Generate unit tests for this Express controller and service using Jest and Supertest. Cover the success case, the user-not-found case, and the forbidden access case for private profiles.”
Gemini is fantastic at this kind of structured generation. It will spit out a well-organized test file that you can pretty much drop right into your project.
Once the tests are passing, a final prompt wraps everything up: "Generate JSDoc comments for the getUserProfile` controller and service functions." In seconds, you have professional, maintainable documentation.
From a vague idea to a fully tested and documented feature, we’ve used each AI for what it does best. The result is a workflow that’s dramatically faster and more thorough than going it alone.
Debugging and Refactoring with an AI Pair Programmer
Beyond just cranking out new code, AI assistants are incredible partners for improving what you’ve already built. This is where you really start to see the productivity gains—when you stop treating them as a code generator and start using them like a senior developer who’s always on call to help you debug, refactor, and optimize your work.

The next time a cryptic error message has you stumped, resist the instinct to immediately search Stack Overflow. Instead, try copying the entire error and stack trace, pasting it into your VS Code chat panel with Claude or ChatGPT, and just see what happens.
Decoding Cryptic Errors Instantly
Your AI assistant can make sense of dense error logs in seconds—the kind that might take a human several minutes to pick apart. Give it the full context: the error message, the code that caused it, and a quick sentence on what you were trying to do. You’ll get back a surprisingly clear, plain-English explanation of the root cause.
A solid prompt for this looks something like this:
“I’m getting this error in my Node.js app when I try to connect to the database. Here are the stack trace and the relevant connection code. What’s causing this, and how can I fix it?”
More often than not, the AI won’t just identify the problem (like a missing environment variable or bad credentials), it’ll hand you the corrected code snippet ready to go.
Strategic Refactoring and Code Modernization
Refactoring is where these tools really flex their muscles. They can look at a tangled, messy function and almost instantly see a cleaner, more efficient way to write it. We’re talking about more than just syntax tweaks; they can suggest entirely new architectural patterns.
To get the best results, you need to be specific about what you want.
- For simplification: “Refactor this function to be more readable and reduce its cyclomatic complexity.”
- For performance: “Can you spot any performance bottlenecks in this code and suggest how to optimize it?”
- For modernization: “Convert this legacy JavaScript (ES5) class into a modern TypeScript class with proper types.”
These kinds of targeted requests guide the AI to give you exactly what you need. You don’t just get different code; you get better code that aligns with your specific engineering goals.
Identifying Security Vulnerabilities Proactively
Before you even think about opening a pull request, you can run a quick security audit with your AI. This is a huge deal for catching common vulnerabilities early in the game, long before they become a real headache.
Think of your AI as a diligent but junior security analyst. It’s fantastic at spotting common patterns like SQL injection risks, cross-site scripting (XSS) flaws, or insecure direct object references. But remember, you’re still the senior engineer who’s responsible for the final review.
A simple but powerful prompt is to feed the AI a controller or service file and ask:
"Act as a security expert and review this code for potential vulnerabilities. Please explain any issues you find and provide a secure alternative."
Adding this single step to your workflow can dramatically improve the security and overall quality of your codebase. By integrating these debugging and refactoring habits, you’re essentially adding a tireless, knowledgeable partner to your team. For a deeper look, our guide on using an AI pair programmer explores more advanced techniques for code reviews and optimization.
Ultimately, learning how to code with ChatGPT, Claude, Gemini, and Copilot for these tasks turns them from cool gadgets into essential collaborators that help you write cleaner, safer, and more efficient code every single day.
Measuring the Impact of AI on Your Workflow
Using AI assistants in your daily coding definitely feels faster, but “feeling” productive doesn’t cut it when you need to make a business case. To really understand the value, you have to move past gut instinct and start looking at the cold, hard data.
So, how do you actually prove the ROI for your team?
This is where the real skill of learning how to code with ChatGPT, Claude, Gemini, and Copilot comes in. It’s not just about getting better at writing prompts—it’s about figuring out which workflows genuinely speed you up and which ones are just noise. You need a way to track what’s working.
From Vague Feelings to Tangible Metrics
First things first, you need to define what “effective” actually looks like for you and your team. Forget broad goals like “code faster.” Instead, focus on specific, measurable outcomes. This simple shift moves the conversation from subjective opinions to objective proof.
Here are a few core metrics that I’ve found incredibly useful for both developers and managers:
- Time Saved per Task: This is the most direct measure of efficiency. How many minutes or hours did an AI save you when generating a unit test, debugging a tricky error, or refactoring a complex function?
- Suggestion Acceptance Rate: For tools like GitHub Copilot, this tells you how often its suggestions are actually useful. A high acceptance rate is a great sign that the AI is in sync with your codebase and style.
- Reduction in Code Churn: This metric looks at how much code gets rewritten or deleted shortly after being committed. Good AI-generated code should stick, which means less rework in your pull requests down the line.
Tracking these numbers helps you build a clear picture of where AI is delivering the biggest wins, so you can double down on what works.
Capturing Every Interaction for Clear ROI
The biggest challenge here is that most of your AI interactions disappear into isolated chat windows or editor tabs, leaving no data trail. This is a massive blind spot.
Consider this: ChatGPT alone commands 60.4% market share in the U.S. generative AI space. With 64% of developers already using it, countless hours of potential productivity gains are going completely unmeasured. You can dig into more of these numbers in this detailed analysis of AI chatbot statistics.
This is exactly the problem that tools like Zest are designed to solve. By plugging directly into VS Code and Cursor, Zest captures every prompt, every response, and every minute you spend with your AI assistants. It turns all that raw data into a consolidated feed of your team’s AI activity.
Imagine getting an automated “AI Standup” summary each morning that shows your wins from yesterday, points out where you got stuck, and tells you exactly how much time you saved. That’s what data-driven AI adoption looks like in practice.
Pinpointing What Works and Scaling Success
Once you start collecting data, you can move from individual tweaks to optimizing your entire team’s performance. For engineering managers, this kind of visibility is a game-changer. When you learn that 93% of companies plan to expand their AI toolset, you know that having clear metrics is the only way to justify the investment and guide your strategy.
With a tool like Zest, you can start answering the questions that really matter:
- Which AI model—ChatGPT, Claude, or Gemini—performs best for our specific codebase?
- What types of tasks, like debugging or documentation, are seeing the biggest time savings?
- Who on the team has discovered a killer prompting technique that we can turn into a shareable “cheatcode” for everyone else?
By systematically measuring your AI-assisted workflows, you stop treating coding as a solo act and start turning it into a collective learning experience. You can spot what your top performers are doing differently, capture their successful patterns, and scale those best practices across the whole organization. This is how you ensure your investment in AI pays real, measurable dividends.
Common Questions About Coding with AI Assistants
When you start weaving AI assistants like ChatGPT, Claude, Gemini, and Copilot into your day-to-day coding, some big questions always come up. It’s one thing to play around with these tools, but it’s another thing entirely to rely on them for professional work. Trust is key.
Let’s tackle the most common concerns developers have about security, code quality, and whether these tools are actually reliable. Getting straight answers will help you build a smart, effective partnership with your AI pair programmer.
Is It Safe to Use AI Tools with Proprietary Code?
This is the big one, and for good reason. The short answer is: it depends entirely on which service you’re using. If you’re using the free, public version of a tool like ChatGPT, your inputs might be used to train their models. That’s a dealbreaker for anything confidential.
The story changes completely with paid, professional-grade services. Tools like the official ChatGPT API, Claude’s paid tiers, and GitHub Copilot for Business come with much stricter data privacy policies. These services are built for professional use and typically guarantee your code stays private and isn’t used for training their public models.
The golden rule is simple: always read the terms of service for your specific tool and follow your company’s data handling policies to the letter. If you’re ever in doubt, give the AI generalized code snippets and context, not entire sensitive files.
What Should I Do When an AI Generates Buggy Code?
Let’s be clear: it’s not a matter of if an AI will give you buggy code, but when. Think of the AI’s output as a suggestion from a super-fast junior developer who’s enthusiastic but a bit naive. It’s a starting point, not the final product. Your expertise is still required.
Here’s how to handle a buggy suggestion without wasting time:
- First, understand it. Read through the code. Does the logic make sense? Does it align with what you asked for? Never just copy and paste.
- Test it. Run the snippet through your existing test suite. This is the quickest way to see if it works and catch any edge cases the AI missed.
- Give feedback and iterate. If the code fails, don’t just scrap it. This is where the real magic happens. Refine your original prompt by telling the AI what went wrong. For example: “That was a good start, but it threw a null reference exception when the user object was empty. Can you add a guard clause to handle that case?”
This back-and-forth feedback loop is how you’ll get to a solid, working solution much faster than starting from scratch.
Which AI Is Best for a Specific Language Like Python or Rust?
There’s no single “best” AI for every language. Models like ChatGPT, Gemini, and Copilot are trained on mountains of public code, so they excel at popular languages with huge codebases, like Python, JavaScript, and Java.
But what about newer or more niche languages like Rust or Zig? You might find one model gives you brilliant code while another struggles. The best strategy is to simply experiment. With the integrated VS Code setup we’ve discussed, you can fire the same tough question at multiple AIs and see their responses side-by-side. It’s the fastest way to find out which model is your best bet for your specific tech stack.
Can AI Help Me Understand an Unfamiliar Codebase?
Absolutely. This is one of the most powerful ways to use an AI assistant. Dropping into a massive, unfamiliar, or legacy codebase can be overwhelming, often taking days or weeks to get your bearings. An AI can slash that time dramatically.
You can paste a complex function or even an entire file into a model with a large context window, like Claude, and ask for a guided tour.
Try a few of these prompts next time you’re feeling lost:
- “Give me a high-level summary of what this code does.”
- “Explain the logic of this function, line-by-line.”
- “What are this module’s external dependencies?”
- “Identify the main entry points and outputs of this class.”
Your AI becomes an on-demand technical guide, saving you hours of tedious code-tracing and helping you contribute to new projects way faster.
Ready to turn your AI coding activity into measurable results? Zest captures every interaction in VS Code and Cursor, providing automated insights so you and your team can ship faster and scale best practices. Start seeing your AI’s true impact at https://meetzest.com.
Master Your AI Coding Cockpit
Transform your VS Code environment into a powerful, integrated command center for faster and safer coding.
📊 Core Metrics
- Feature Velocity — How quickly can you build a feature from design to documentation?
- Context-Switching Cost — Measure the time saved by keeping all tools inside the editor.
- Code Quality Score — Assess the reduction in bugs and vulnerabilities from AI-assisted reviews.
🕹️ My Cheatcodes
- 🌱 Context First — Always provide goal, language, framework, and existing code in your prompts.
- 🦎 Delegate by Strength — Use ChatGPT for design, Copilot for boilerplate, Claude for refactoring, and Gemini for tests.
- ⚡ Iterate on Bugs — When AI code fails, provide feedback on the error instead of starting a new prompt.
📈 Reflection Points
- 💡 Am I choosing the right AI for the task, or just using my default?
- 🧩 Did I validate the AI's security suggestions with my own expertise?
- 📘 How can I turn a successful prompting pattern into a reusable snippet for my team?
Gallery
Lemon shots



