
Git Delete Branch A Developer's Guide

To safely delete a Git branch, you’ll use git branch -d <branch-name> for a local branch that has already been merged. If the branch hasn’t been merged, you’ll need to force-delete it with git branch -D <branch-name>. To remove a remote branch, the command is git push origin --delete <branch-name>.
Why a Clean Repository Matters
Think of your Git repository like a workshop. When it’s filled with old, forgotten projects and half-finished experiments, it’s tough to find what you need and easy to make a mess. A cluttered repo with dozens of old branches does the same thing—it slows your team down and creates confusion.
Good branch hygiene isn’t just about being tidy. It’s about boosting performance, keeping things clear, and preventing future headaches. When branches from merged features or abandoned ideas hang around, they become a form of technical debt, making it a real challenge for developers to navigate the project’s history. You can learn more about how to get ahead of this in our guide on how to reduce technical debt.
This digital clutter has real consequences. Letting old branches pile up can lead to:
- Confusion: A new team member might accidentally base their work on an old, irrelevant feature branch.
- Slower Performance: Commands like
git branchandgit fetchcan get noticeably sluggish in a repo with hundreds or thousands of stale branches. - Maintenance Overhead: It’s nearly impossible to tell the difference between active development, abandoned work, and safely merged features.
The Scale of the Problem
The stale branch problem is far more common than most teams think. It sneaks up on you. For instance, during a major cloud migration in 2022, one engineering team discovered over 600 stale remote branches scattered across their repositories. Some of them were two years old.
How does this happen? Repository hosts like GitHub and BitBucket don’t automatically delete branches after a merge, so the cleanup is left to you. You can read more about this team’s cleanup effort to see how they tackled the issue.
The most important mindset shift is understanding that when you delete a merged branch, the work isn’t lost. The commits are safe and sound in your main branch’s history. A branch is just a pointer, and cleaning it up is a professional habit that benefits the entire team.
How to Delete Local Branches Safely
First things first, let’s clean up your local machine. Getting rid of old branches you no longer need is just good housekeeping in Git. There are two main ways to do this, and the one you pick really boils down to one simple question: have the changes on that branch been merged?
This decision is at the heart of keeping your repository tidy. If the work is done and merged, the branch can go.
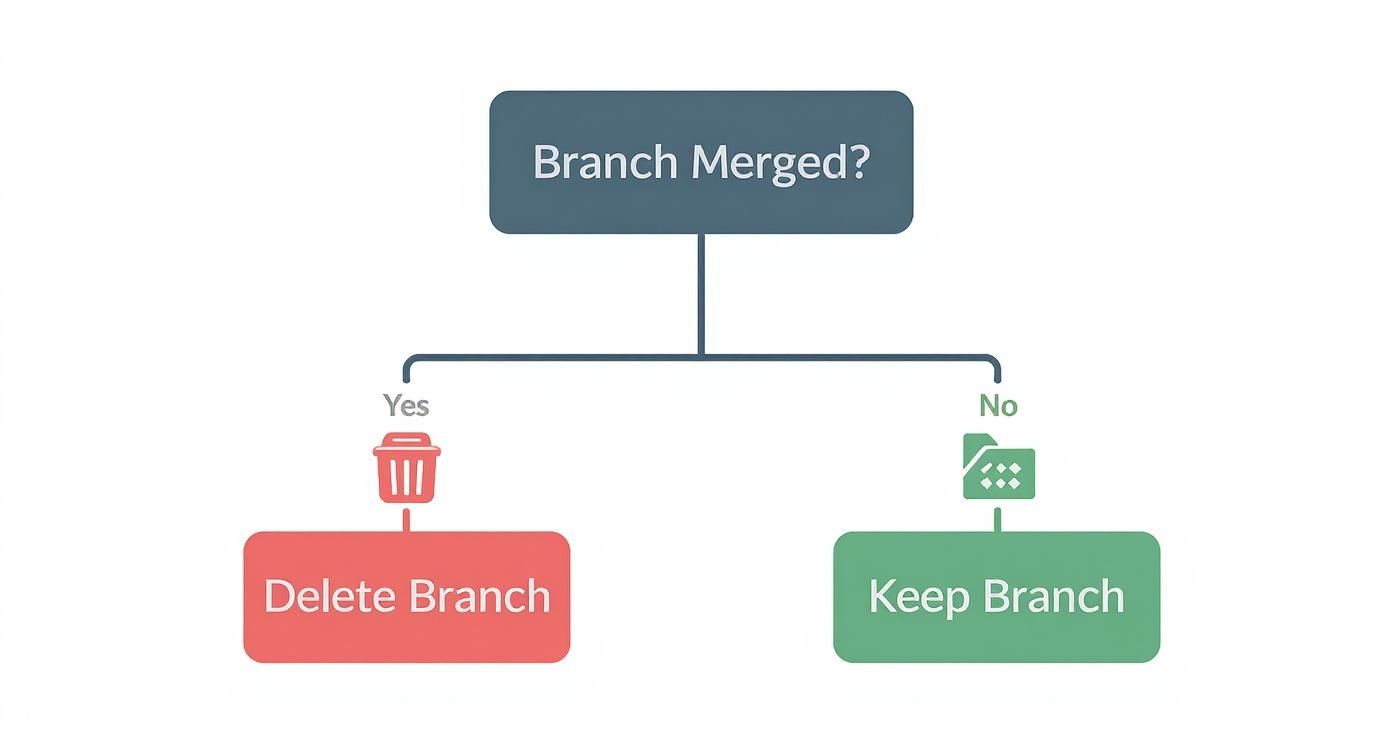
As you can see, a branch’s merge status is the key factor in deciding whether to keep it or toss it.
The Standard, Safe Way to Delete a Branch
Nine times out of ten, you’ll be deleting a feature branch that’s already been merged into your main branch. For this everyday cleanup, you’ll want to use the -d flag. It’s your safest bet.
Here’s how it looks:
git branch -d feature/user-login
Think of that lowercase -d as your safety net. If you accidentally try to delete a branch that has work on it that hasn’t been merged yet, Git will stop you dead in its tracks. It throws an error, preventing you from losing any commits. It’s a fantastic built-in check that forces you to confirm the work is safely integrated somewhere else before the branch disappears.
When You Have to Force It
But what about those branches that were just an experiment? Maybe you started down a path, realized it was a dead end, and now you just want to scrap it entirely. You have no intention of ever merging those changes.
This is where the capital -D flag comes into play.
git branch -D experiment/new-api-design
Be careful with this one. Using
git branch -Dis a destructive move. It tells Git to get rid of the branch and all the unmerged commits on it, no questions asked. There’s no confirmation prompt, so make absolutely sure you’re ready to throw that work away for good. It’s the right tool for abandoning failed experiments, but the wrong one for routine cleanup.
To make it even clearer, here’s a quick reference table to help you decide which command to use when you’re tidying up your local branches.
Local Branch Deletion Command Cheatsheet
| Command | Flag | Best For | Safety Check |
|---|---|---|---|
git branch -d <branch-name> |
-d | Routine cleanup of fully merged branches. Your go-to command. | Yes. Git will block deletion if the branch has unmerged commits. |
git branch -D <branch-name> |
-D | Discarding a branch with unmerged work, like a failed experiment. | No. This command forces deletion without any warnings. |
Ultimately, choosing between -d and -D is about intent. The -d flag protects you from mistakes, while -D gives you the power to consciously discard work.
Removing Branches from Remote Repositories
Cleaning up your local machine is a great start, but it’s only half the job. If you leave that same branch lingering on the remote server, it can still cause confusion for the rest of your team. To really finish the cleanup, you need to remove the branch from its origin—whether that’s GitHub, GitLab, or another remote host.

The clearest and most direct way to delete a remote branch is with the --delete flag. This command is explicit about what you’re trying to do, which makes it a safe and widely accepted standard.
The Modern Way to Delete a Remote Branch
So, let’s say your pull request for feature/new-login just got approved and merged into the main branch. Awesome! Now your local feature/new-login branch is obsolete, and so is its counterpart on the remote.
To get rid of it from the remote server (which is usually named origin), you’d pop open your terminal and run this:
git push origin --delete feature/new-login
After you run it, your terminal should give you a confirmation message, letting you know the branch has been successfully removed from the remote. This one command cleans up the central repository for everyone, keeping the project’s branch list tidy and relevant. It’s a simple but vital part of any good collaborative workflow.
You might sometimes stumble upon an older, more cryptic syntax for this:
git push origin :feature/new-login. While it technically does the same thing, it’s far from intuitive. That little colon prefix is easy to miss or misread, whereas the--deleteflag makes your intention crystal clear.
Sticking with git push origin --delete <branch-name> is just plain good practice. It gets rid of any ambiguity and lowers the risk of making a mistake. It’s really the professional standard for managing remote branches today.
Troubleshooting Common Deletion Errors
Even experienced developers hit roadblocks when deleting Git branches. It’s just part of the process. The good news is that these error messages are usually easy to fix once you know what they mean. Let’s break down the most common ones you’ll encounter.
The “Unmerged Work” Dilemma
By far the most common error is when you try to delete a branch with commits that haven’t been merged yet. If you use the safe -d flag, Git will stop you in your tracks to prevent you from losing work.
You’ll see a message like this:
error: The branch 'feature/bug-fix' is not fully merged.
If you are sure you want to delete it, run 'git branch -D feature/bug-fix'.
Think of this as Git’s built-in safety feature. It’s warning you that commits on this branch don’t exist anywhere else. If you’re absolutely certain that work is no longer needed or was merged through a different process, you can follow Git’s advice and force the deletion with git branch -D feature/bug-fix.
Can’t Delete the Branch You’re On
Here’s another classic. You try to delete a branch, but Git says no because it’s the one you’re currently using.
The error is pretty clear:
error: Cannot delete branch 'feature/new-header' checked out at '/path/to/your/project'
You can’t saw off the branch you’re sitting on. The fix is simple: just switch to another branch first. Hopping over to main with a quick git checkout main will do the trick. After that, you’re free to run the delete command again.
Cleaning Up Stale Remote Branches
You might also run into a situation where a teammate deletes a remote branch, but it still shows up in your local list. Your local Git repository doesn’t automatically know the remote branch is gone until you tell it to check.
This is where git fetch --prune becomes your best friend. This command fetches updates from the remote and also prunes—or removes—any local references to remote branches that have been deleted. It’s a great way to keep your branch list clean and accurate.
It might surprise you, but neglecting this cleanup is widespread. Industry analysis shows that 30-40% of merged branches in open-source projects are often left behind, usually because developers are unsure about the right way to delete them. While some platforms offer automated cleanup, it’s often a feature you have to enable yourself. You can read more about branch hygiene practices on dev.to.
Putting Your Branch Cleanup on Autopilot
Look, manually deleting branches is fine, but it’s a repetitive task. And if there’s one thing developers are good at, it’s automating repetitive tasks. Setting up a simple workflow to handle this for you is the best way to keep your repository clean without even thinking about it.

The easiest win here doesn’t even involve the command line. Head over to your repository settings on platforms like GitHub or GitLab. You’ll find an option to automatically delete head branches after pull requests are merged. Just check that box.
Seriously, that one click will handle 90% of your branch cleanup. The moment a feature branch is merged, the remote branch disappears. This is a must-have for any modern development workflow and fits perfectly with the whole idea of what is continuous integration.
A Handy Script for Local Pruning
Now, what about your local machine? It can get cluttered with old branches that have already been deleted on the remote by you or your teammates.
This is where a little command-line magic comes in. This one-liner is my go-to for tidying up all those stale local branches in one fell swoop.
git branch -vv | grep ‘: gone]’ | awk ‘{print $1}’ | xargs git branch -d
Let’s quickly walk through what this chain of commands is doing:
git branch -vv: This lists all your local branches and, crucially, shows what remote branch they’re tracking.grep ': gone]': It then filters that list, looking for any line that containsgone. Git adds this when a local branch’s remote counterpart has been deleted.awk '{print $1}': From those “gone” lines, this pulls out just the branch name.xargs git branch -d: Finally, it feeds those branch names into the safe delete command,git branch -d, which removes them one by one.
I highly recommend adding this command as an alias in your
.bashrcor.zshrcfile. Call it something likegit-prune-local. It turns a multi-step cleanup chore into a single, satisfying command you can run anytime to get your local environment back in sync.
Common Questions and Edge Cases
Let’s tackle a few common “what if” scenarios you might run into when cleaning up branches. Think of this as the troubleshooting guide for those less-than-perfect situations.
What Happens if I Accidentally Delete a Branch?
First, take a deep breath. It happens to everyone. The good news is that Git almost never truly loses your work right away. If you’ve just deleted a local branch, your best friend is git reflog. This command is like a safety net, showing you a history of where your HEAD has been.
Just run git reflog, find the commit hash from the tip of your deleted branch, and you can bring it back to life with a simple command:
git checkout -b <branch-name> <commit-hash>
If you pushed the branch to a remote like GitHub or GitLab, recovery is often even simpler. You can usually find the branch history right in the closed pull request.
How Can I Delete Multiple Branches at Once?
When you’ve got a lot of old branches to clear out, deleting them one by one is a pain. You can get clever by mixing Git commands with a bit of shell scripting to remove branches that match a specific pattern. This is a bit more advanced, so tread carefully.
For instance, if you want to nuke all local branches starting with fix/, you could use something like this:
git branch | grep 'fix/' | xargs git branch -D
A Word of Caution: This is a powerful command. The
-Dflag is unforgiving and will force-delete every matching branch without asking twice. I always recommend running the first part of the command (git branch | grep 'fix/') by itself first, just to see a list of what you’re about to delete.
Is It Okay to Delete the Main or Master Branch?
In a word: no. While Git might technically let you do it (if you’re not checked out to it), you should never, ever delete your primary branch, whether it’s called main, master, or something else. This branch is the foundation of your project—the single source of truth.
Wiping it out would cause massive confusion and completely break the workflow for you and your team.
Thankfully, most remote platforms have safeguards. GitHub and GitLab offer branch protection rules, which are a lifesaver. You can set them up to prevent anyone from accidentally deleting your default branch. This is just one of many software engineering best practices that keeps a repository safe and sound.
✅ Prompt
“Checklist: confirm my Astro site is deployed on Cloudflare Workers with best-in-class performance, SEO, and DX. Verify adapter, asset storage, caching, hydration, and SSR/SSG choices. Give me a clear yes/no on each item and point out fixes if something’s missing.”
📝 Example Response
Astro on Cloudflare Workers — Deployment Checklist
- Adapter → Using
@astrojs/cloudflareor@astrojs/cloudflare/worker? → ✅ Yes - Static vs SSR → Static pages prebuilt + only SSR where required (API, auth, etc.) → ✅ Yes
- Cold start avoidance → Worker bundle < 1MB, no heavy deps → ✅ Yes
- Assets → Offloaded to R2 / Cloudflare Images, not bundled in Worker → ❌ No → Fix: move images to R2 and rewrite URLs
- Caching → Edge cache headers set (
Cache-Control,stale-while-revalidate) → ✅ Yes - SEO → Title/meta tags verified, hreflang (if multilingual), robots.txt and sitemap.xml generated → ✅ Yes
- Core Web Vitals → Partial hydration configured, Lighthouse score >90 → ✅ Yes
- Global Edge → Tested from multiple PoPs (US/EU/Asia) for <100ms TTFB → ✅ Yes
- Limits → Worker within 30ms CPU budget, script <10MB → ✅ Yes
- Monitoring → Wrangler tail + Analytics enabled → ✅ Yes
Result: 9/10 checks passed. Only asset storage needs fixing.
At Zest, we’re building tools to help developers and teams master their AI-assisted coding workflows. Zest turns daily coding activity into actionable insights, helping you measure and improve how you use AI in VS Code and Cursor. Find out how to ship faster with Zest.
Gallery
Lemon shots



