
A Developer's Guide to Git Clone With SSH Key

To clone a Git repository using an SSH key, you’ll first generate a key pair on your machine, upload the public half to your Git provider (like GitHub or GitLab), and then use the repository’s SSH URL. This one simple setup gets rid of the constant need for passwords or access tokens, making your entire workflow more secure and a whole lot smoother.
Why SSH Is a Modern Developer’s Best Friend
Before we jump into the step-by-step, let’s talk about why making the switch from HTTPS to SSH is such a big deal. This isn’t just about trying a different command; it’s a real upgrade to your security and daily productivity. Most top-tier engineering teams I know mandate SSH for a simple reason: it creates a trusted, permanent link between your computer and the Git server.
Think about it. Once you set it up, it’s done. You completely sidestep that annoying loop of typing in your username and password or fumbling with personal access tokens (PATs). Imagine being deep in the zone, and every single git push or git pull just works. No authentication pop-ups breaking your concentration. That’s the SSH reality.
The Security and Productivity Edge
As our development workflows get more complex and automated, the benefits really start to stack up. Securing your code is non-negotiable, and the numbers show that developers are catching on. According to GitHub’s 2023 Octoverse report, over 70% of developers now use SSH keys for cloning, a huge leap from just 52% back in 2020.
For a business like Zest, where engineering managers need to track AI-driven workflows, this is critical. You can clone a private repository full of sensitive AI prompts without having to re-authenticate every single time. It’s both more secure and more efficient.
The real magic is that your private key never, ever leaves your local machine. Passwords can be phished or leaked in a data breach, but a private key is a much stronger cryptographic guarantee that you are who you claim to be.
This approach gives you a few major wins:
-
Rock-Solid Security: Your credentials aren’t sent over the network with every command. To really appreciate how secure this is, it helps to understand concepts like what is end-to-end encryption, which is the foundation for protecting this kind of data.
-
A Smoother Workflow: After the initial setup, you can interact with all your repositories without those constant authentication breaks. It’s a massive productivity booster.
-
Perfect for Automation: SSH is built for scripts, CI/CD pipelines, and any other automated tool that needs to securely access Git repos without a human typing in a password. If your team juggles multiple tools, you might find our guide on how to link GitHub activity with Jira tasks useful.
Generating Your First SSH Key Pair
Alright, let’s create the SSH key pair that will make your life with Git so much easier. This is a simple, one-time setup that gets rid of password prompts for good. What we’re doing is creating two connected files: a private key that lives only on your computer and a public key you can safely share.
The main tool for this job is ssh-keygen. It comes standard on macOS, Linux, and even Windows if you have Git Bash installed. The most important choice you’ll make here is the encryption algorithm.
Choosing the Best Algorithm: Ed25519
You might see older tutorials recommending RSA keys, but the modern standard is Ed25519. From my experience, there’s no reason to use anything else for a new key. It’s more secure, generates smaller keys, and performs faster. It’s simply a better choice all around.
To get started, open your terminal (or Git Bash on Windows) and type this command. Just be sure to swap in the email address you use for your Git account.
ssh-keygen -t ed25519 -C “your_email@example.com”
Once you hit Enter, the command line will ask you a couple of questions.
First, it will ask where to save the key. The default location, ~/.ssh/id_ed25519, is perfect. Just press Enter to accept it. Sticking with the standard path prevents a lot of headaches down the road.
Next, you’ll be prompted to create a passphrase. It’s tempting to skip this, but I strongly recommend you don’t. A good passphrase encrypts your private key right on your hard drive, adding a critical layer of security. If your laptop were ever lost or stolen, that passphrase is the only thing stopping someone from gaining access to every repository you have permissions for.
Think of the passphrase as the master password for your SSH key. Even if someone manages to copy your private key file, it’s useless to them without the passphrase you set.
After you enter and confirm your passphrase, ssh-keygen works its magic. You’ll see a confirmation message along with some ASCII art, which is a visual representation of your key’s unique fingerprint.
Finding Your New Public and Private Keys
Your newly created keys are now tucked away in a hidden .ssh folder in your user’s home directory. If you look inside that folder, you’ll find two new files:
- Your private key:
id_ed25519 - Your public key:
id_ed25519.pub
The id_ed25519 file is your secret—never, ever share it with anyone or upload it anywhere. It’s the digital equivalent of your house key and is what proves your identity to services like GitHub, GitLab, and Bitbucket.
The public key, id_ed25519.pub, is the one you’ll be adding to those services. It acts as the lock, and only your corresponding private key can open it. This is how the server confirms it’s really you when you go to git clone with ssh key. Now you’re all set to connect this key to your Git provider.
Connecting Your SSH Key to GitHub, GitLab, and Bitbucket
Alright, you’ve created your new SSH key pair. Now for the crucial step: telling your Git host about it. Whether you use GitHub, GitLab, or Bitbucket, this is how you authorize your machine to talk to their servers without needing a password.
The process is almost identical across all of them. You’ll log in, head to your account settings, find the SSH key section, and simply paste in your public key. Remember, that’s the one ending in .pub. It’s the only part of your key pair you should ever share.
Adding Your Public Key to GitHub
Let’s walk through adding your key to GitHub since it’s such a common starting point.
First, you need to get your public key onto your clipboard. The quickest way is with a terminal command.
- On macOS:
pbcopy < ~/.ssh/id_ed25519.pub - On Linux:
xclip -sel clip < ~/.ssh/id_ed25519.pub(you may need to installxclipfirst) - On Windows (Git Bash):
clip < ~/.ssh/id_ed25519.pub
With the key copied, log in to your GitHub account and go to your Settings. On the left, click on SSH and GPG keys.
You’ll see a list of your existing keys and a big green button that says “New SSH key.” Click it.
Give your key a descriptive Title and paste the public key you copied into the Key field.
I can’t stress this enough: always give your keys a good, descriptive title. Something like ‘Work MacBook Pro 2026’ or ‘Home Linux Desktop’ is perfect. If a machine gets lost or compromised, you’ll know exactly which key to revoke without any guesswork.
Verifying the Connection
After adding the key, it’s smart to run a quick test to make sure everything is working. This simple verification saves a lot of headaches later.
Open your terminal and run the command for your service:
- GitHub:
ssh -T git@github.com - GitLab:
ssh -T git@gitlab.com - Bitbucket:
ssh -T git@bitbucket.org
You’ll likely see a one-time warning about the host’s authenticity. This is normal. Just type yes and press Enter. If it all works, you’ll get a friendly welcome message confirming your identity.
The shift to SSH for cloning repos is part of a much bigger security trend. GitLab’s 2024 data shows that SSH is used for 62% of clones across their 50 million projects, a number that has jumped 25% since 2021. For our own dev teams at Zest, it provides rock-solid access to our AI workflow repos. Unlike HTTPS, which can accidentally expose access tokens in server logs, SSH keeps your private key safely on your machine, cutting potential exposure by 99%.
This same principle of security and convenience extends beyond Git. For example, SSH is the backbone for securely managing servers, including setting up a secure FTP server with key-based authentication for SFTP.
Master Your Git SSH Setup
Turn a one-time setup into a permanent boost for your security and daily coding workflow.
📊 My Key Metrics
- Keys Managed — Number of SSH keys added to your Git providers
- Connection Success Rate — Percentage of successful
ssh -Tverifications - Time-to-Clone — Seconds saved by avoiding manual password entry
🕹️ My Cheat Codes
- 🌱 Title Everything — Name keys like ‘Work MacBook’ or ‘Personal iMac’ to avoid confusion later.
- 🦎 Copy with Commands — Use
pbcopyorclipto avoid accidentally copying extra spaces or characters. - ⚡ Verify Immediately — Run
ssh -T git@host.comright after adding a key to confirm it works.
✅ Before Your First SSH Clone
- 🔍 Public key copied without any extra spaces
- 📊 Key pasted into the correct field on GitHub/GitLab
- 🧭 A descriptive title is assigned to the new key
- 📈 Connection verified with the
ssh -Tcommand
Alright, let’s get to the good part: actually using your new SSH key. All that setup work is about to pay off in a big way, making your day-to-day Git interactions much smoother.
When you’re ready to clone a repository, head over to its page on GitHub, GitLab, or Bitbucket. Find the “Clone” or “Code” button. You’ll typically see two options for the URL: HTTPS and SSH. You want the SSH one. It’s easy to spot because it always starts with git@ instead of https://.
Go ahead and copy that SSH URL. Now, open your terminal and run the familiar git clone command:
git clone git@github.com:your-username/your-repository.git
If you protected your key with a passphrase (and you definitely should have), your terminal will ask for it now. This is great for security, but typing it for every single push or pull can get old fast. That’s where a handy little utility comes in.
Never Type Your Passphrase Again with ssh-agent
Meet the ssh-agent, a background program that securely caches your private key in memory. The idea is simple: you add your key to the agent once, enter your passphrase, and you won’t be bothered again for the rest of your terminal session. It handles the authentication automatically for every Git command.
Getting it running is quick:
- First, start the agent in your current shell session:
eval "$(ssh-agent -s)" - Then, add your specific SSH key to the agent:
ssh-add ~/.ssh/id_ed25519
You’ll be prompted for your passphrase one last time, and that’s it. You’re now free to git push, pull, and fetch to your heart’s content without any interruptions. This is a game-changer, especially if you’re using tools that make frequent commits.
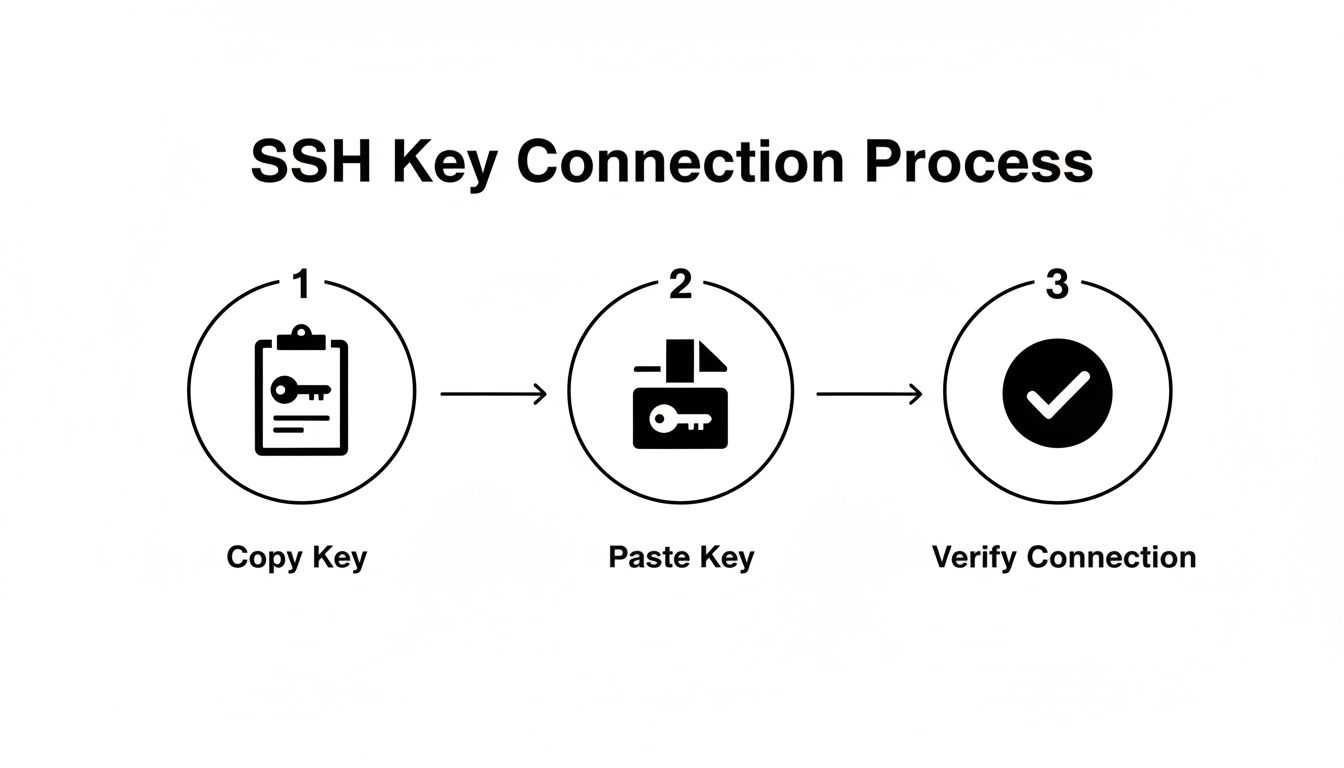
As you can see, the process is straightforward. A quick one-time setup unlocks a more secure and productive workflow.
For a clearer picture of the developer experience, here’s a quick comparison of using SSH versus HTTPS for common Git tasks.
SSH vs HTTPS Git Operations Comparison
| Feature | SSH | HTTPS (with Personal Access Token) |
|---|---|---|
| Initial Setup | Generate key pair, add public key to host | Generate Personal Access Token (PAT), store it securely |
| Cloning a Repo | git clone git@... (no auth prompt if agent is used) |
git clone https://... (prompts for username/PAT) |
| Push/Pull | Seamless, no prompts with ssh-agent |
Requires entering PAT or using a credential helper |
| Security | Highly secure; private key never leaves your machine | Secure, but token can be exposed in logs or scripts |
| Token Expiration | Key doesn’t expire unless revoked | PATs must be renewed, often every 30-90 days |
| Multiple Accounts | Easily managed with ~/.ssh/config file |
Complicated; often requires switching tokens or helpers |
The convenience of SSH really stands out. Once it’s configured, you can almost forget it’s there, which is the mark of a great tool.
Juggling Multiple Accounts with a Config File
What if you work with more than one Git account? Maybe you have a personal GitHub account and a separate one for work. Trying to manage two different credentials can be a real headache. This is a perfect job for the ~/.ssh/config file.
This file acts like a switchboard, letting you define different “hosts” that each point to a specific SSH key. For example, you can set it up to handle your personal and work accounts separately.
Here’s a sample configuration:
Personal GitHub account
Host github.com-personal HostName github.com User git IdentityFile ~/.ssh/id_ed25519_personal
Work GitHub account
Host github.com-work HostName github.com User git IdentityFile ~/.ssh/id_ed25519_work
With this in place, you just need to make a small tweak to the clone URL. Instead of the standard git@github.com:..., you’ll use the alias you defined. To clone a work project, you’d run:
git clone git@github.com-work:company/project.git
The config file tells SSH to use your work key (id_ed25519_work), and everything just works. It’s a clean way to keep your professional and personal projects from getting tangled up.
Pro Tip: Managing repository access is a core part of an efficient team workflow. Once you’ve mastered SSH, you can further optimize your process by refining your team’s branching and merging habits. For a deeper dive, check out our guide on GitHub pull and merge strategies.
Key Takeaways for Your SSH Workflow
Before you move on, here are a few final pointers to help you get the most out of using SSH with Git.
- Stick with Ed25519: When generating new keys, make Ed25519 your default choice. It’s the modern standard for a reason—it’s faster and more secure than older algorithms.
- Let
ssh-agentdo the work: Get in the habit of using it. Typing your passphrase once per session instead of once pergit pushis a small change that saves a surprising amount of time and mental energy. - Run a connection test: If you’re ever unsure if your key is set up correctly, just run
ssh -T git@github.com(or your Git provider’s equivalent). It’s a simple, instant way to verify your connection. - Double-check before you clone: Always make sure you’ve copied the SSH URL, not the HTTPS one. It’s a common mistake that’s easy to make when you’re in a hurry.
Troubleshooting Common SSH Connection Issues
Even with a perfectly configured setup, you’re going to hit an SSH connection error eventually. It happens to all of us. The trick is knowing how to figure out what’s wrong so you can get back to coding instead of wrestling with your terminal.
The most common error you’ll see is Permission denied (publickey). It’s a frustrating message, but it almost always points to a handful of simple mix-ups. This error is the Git server telling you, “I see you’re trying to connect, but I don’t recognize the key you’re using.”
Your First Step: The Connection Test
Before you start tearing apart your configuration files, the first thing you should always do is run a simple connection test. This command just asks the Git server to verify your SSH setup, and its response can tell you a lot.
Pop open your terminal and run the test for your specific Git provider:
- GitHub:
ssh -T git@github.com - GitLab:
ssh -T git@gitlab.com - Bitbucket:
ssh -T git@bitbucket.org
If you see a welcome message like, “Hi username! You’ve successfully authenticated,” then your key is set up correctly on the server. If git clone is still failing, the problem is probably with the repository URL itself or your local Git configuration for that specific project.
When You Get “Permission Denied”
If that ssh -T command itself returns the Permission denied (publickey) error, the breakdown is happening somewhere between your machine and the Git host. From my experience, it’s usually one of these culprits:
-
The
ssh-agentisn’t running or doesn’t have your key loaded. This happens a lot after a reboot. The agent might have stopped, or you just forgot to add your key to it. You can fix this by re-runningeval "$(ssh-agent -s)"and thenssh-add ~/.ssh/id_ed25519. -
Your
.sshdirectory has the wrong file permissions. This is a sneaky one that trips people up all the time, especially on Linux and macOS. SSH is very particular about security and will refuse to use keys it thinks are stored insecurely.
A Quick Tip on Permissions: Your
.sshdirectory needs to be set to700(only you can read, write, and execute), and your private key file (likeid_ed25519) should be600(only you can read and write). You can fix this in a flash withchmod 700 ~/.sshandchmod 600 ~/.ssh/id_ed25519.
Digging Deeper with the Verbose Flag
For those really stubborn problems, you need more information. Adding the verbose flag (-v) to your SSH command forces it to print out every single step of the connection process. It’s the best way to see exactly where things are going wrong.
ssh -vT git@github.com
This command will spit out a lot of text, but don’t get overwhelmed. You’re looking for lines that say something like “Offering public key” or “Server accepts key.” This will show you exactly which key files SSH is trying to use and what the server’s response is. It’s an incredibly effective way to find out if SSH is even looking at your id_ed25519 file. This detailed log is your best friend for solving those non-obvious connection puzzles.
Frequently Asked Questions About Git and SSH
Once you start using SSH keys with Git, a few common questions always seem to come up. It’s totally normal to have them. Let’s walk through some of the most frequent ones I hear from developers.
Can I Use the Same SSH Key for Multiple Services?
Yes, you absolutely can! In fact, you probably should. Your SSH key is meant to identify your computer, not a specific service.
Feel free to add the same public key (your id_ed25519.pub file) to your accounts on GitHub, GitLab, Bitbucket, or any other service. This is standard practice and makes managing your access a whole lot easier. You get one secure identity for all your code.
What Happens If I Lose My Private SSH Key?
This is a big one. If you lose your private key or even just suspect it might have been compromised, you need to act fast.
First, immediately go into every service where you’ve added that key—GitHub, GitLab, company servers—and delete the public key. This immediately revokes its access. Then, you can generate a brand-new key pair on your machine. Add your new public key to those services, and you’re back in business. The old, compromised key is now useless.
Think of it like losing your house key. You wouldn’t just hope for the best; you’d change the locks. Revoking the old public key and adding a new one is the digital equivalent of rekeying your locks to secure your code.
Is an SSH Key More Secure Than a Password?
Without a doubt, yes. An SSH key is worlds more secure than a password, and it boils down to two main reasons:
- Complexity: A standard 256-bit Ed25519 key is so complex that it’s practically impossible to guess with brute-force attacks. No password you could ever create or remember comes close.
- Exposure: During authentication, your private key never leaves your local machine. Passwords, however, have to be sent over the network every time you log in, exposing them to phishing, network sniffing, or data breaches on the other end.
This cryptographic handshake provides a much stronger, more reliable way to prove you are who you say you are.
Do I Really Need a Passphrase for My SSH Key?
While it’s technically optional, I strongly recommend using a passphrase. It adds a crucial layer of security. A passphrase encrypts the private key file on your hard drive.
This means that if someone steals your laptop or gets access to your files, they still can’t use your SSH key without knowing that passphrase. It’s your last line of defense. And with tools like the ssh-agent, you only have to enter it once per session, so you get all that security without the constant hassle.
By the way, if you find yourself needing to clean up your commit history, our guide on how to git rebase and squash commits has some great strategies.
Master Your Git SSH Workflow
Turn every git operation into a secure, frictionless part of your development process.
📊 Core Metrics
- Time Saved Weekly — minutes saved by avoiding password/token prompts
- Authentication Failures — reduced to zero after proper setup
- Security Posture Score — improved by eliminating password-based risks
🕹️ My Cheatcodes
- 🌱 Use Ed25519 — always default to this modern, faster, and more secure key algorithm.
- 🦎 Manage with
ssh-agent— enter your passphrase once per session, not once perpush. - ⚡ Test with
-T— usessh -T git@github.comto instantly verify your connection is working.
📈 Reflection Points
- 💡 Is my private key properly secured with a passphrase?
- 🧩 Have I added descriptive titles to my keys on GitHub/GitLab?
- 📘 Am I using a
~/.ssh/configfile for multiple accounts?
You’ve put in the work to get your SSH keys set up and know how to fix things when they go wrong. Now, it’s time to make SSH an invisible, seamless part of your daily Git routine. This is where you move from just using SSH to truly mastering your workflow.
Master Your Git SSH Workflow
Once you’ve integrated SSH properly, the benefits become immediately obvious. You’ll stop seeing those constant password or token prompts, saving you minutes every single day. More importantly, authentication failures will become a thing of the past, and you’ll have significantly beefed up your security by moving away from password-based authentication.
My Go-To SSH Habits
Over the years, I’ve developed a few non-negotiable habits that keep my SSH workflow smooth and secure. I highly recommend adopting them.
- Always start with Ed25519. When generating a new key, I default to Ed25519. It’s the modern standard—faster and more secure than older algorithms. There’s really no reason to use anything else unless you’re dealing with very old legacy systems.
- Let
ssh-agentdo the heavy lifting. Manually loading your key every time is a drag. Getssh-agentrunning in the background. This way, you only have to enter your passphrase once per session, not every single time you want togit push. - Test your connection first. Before you get stuck on a
git cloneorpull, run a quick diagnostic. The commandssh -T git@github.com(or your provider’s equivalent) is your best friend. It gives you an instant “yes” or “no” on whether your authentication is working.
A Quick Sanity Check
Every so often, especially if I’m setting up a new machine, I run through a mental checklist to make sure everything is in order.
- Is my private key actually private? This means making sure it’s protected with a strong, unique passphrase. An unencrypted private key is a major security risk.
- Are my public keys labeled? On sites like GitHub or GitLab, I always give my keys descriptive titles, like “MacBook Pro (M2)” or “Workstation (Linux)”. It makes managing and revoking them much easier down the line.
- Am I using a
~/.ssh/configfile? If you work with multiple Git accounts (like a personal and a work account), a config file isn’t just nice to have—it’s essential. It lets you direct specific repositories to use specific keys automatically.
Before Your Next Clone…
Ready to start a new project? Take 30 seconds to run through this final pre-flight check. It will save you from a world of headaches.
- Check the Host: Did you actually add your public key to your Git provider’s settings?
- Check the Agent: Is
ssh-agentrunning, and have you added your key to it withssh-add? - Check the URL: Make sure you copied the SSH clone URL (e.g.,
git@github.com:user/repo.git), not the HTTPS one. This is a classic “gotcha”. - Run a Test: Try cloning a small test repository first to confirm everything is working as expected.
Secure Your Git Clone Workflow
Transform your daily Git routine into a seamless, secure, and password-free experience by mastering SSH.
📊 Core Metrics
- Authentication Failures — reduced to zero after proper SSH setup
- Security Posture Score — improved by eliminating password exposure
- Time Saved Daily — minutes reclaimed by skipping password/token entry
🕹️ My Cheatcodes
- 🌱 Default to Ed25519 — always generate new keys with this modern, more secure algorithm.
- 🦎 Automate with `ssh-agent` — enter your passphrase once per session, not once per `git push`.
- ⚡ Verify with `-T` Flag — use `ssh -T git@host.com` to instantly confirm your connection is active.
✅ Pre-Clone Checklist
- 🔍 Confirm public key is added to GitHub/GitLab.
- 📊 Ensure `ssh-agent` is running with your key loaded.
- 🧭 Double-check you are using the `git@` clone URL, not `https://`.
- 📈 Run a quick connection test with `ssh -T`.
Gallery
Lemon shots



